Westlaw Australia Guide - Annotate your documents
Highlighting and notes
- When you select text in a document, a shortcut menu will appear.
- You have the option to save the highlighted text to a folder. When you hover over Save to Folder, a selection of your folders will be displayed. Select a folder to save the highlighted text and document to a folder.
- You can choose to highlight the text in a particular colour.

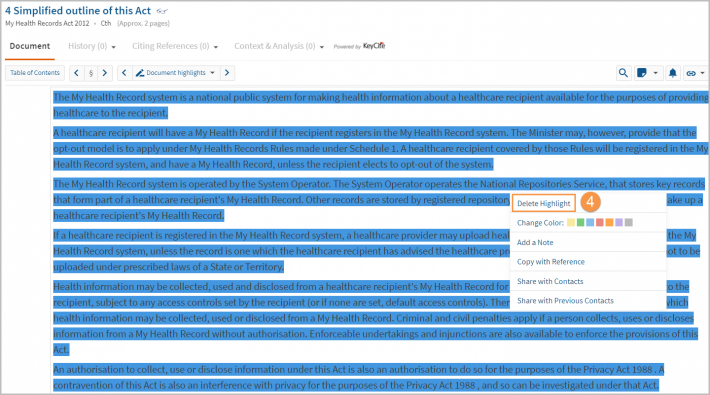
- To delete a highlight, click on the highlighted text and select Delete Highlight.
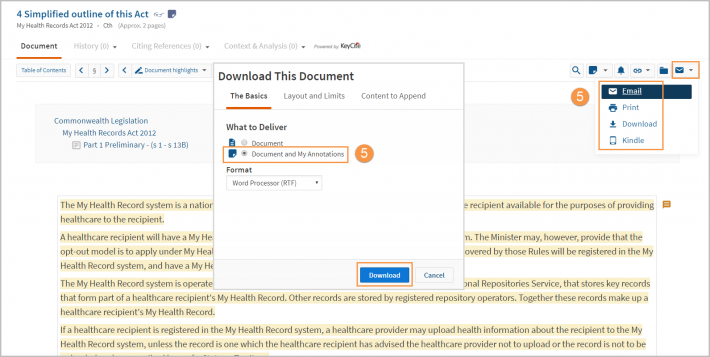
- When you print, download or email documents that have highlights, you can include these by selecting the Document and My Annotations option.
Adding a note to a document
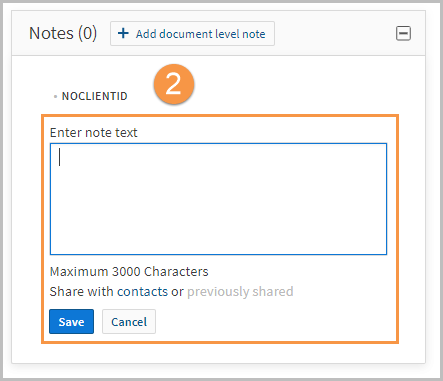
Document-level notes display at the top of the page, rather than next to the text. These notes remain indefinitely or until you delete them.
- From the document view page, click on the Add note icon from the tool bar and select Add document level note.

- Write your note in the space provided in the Note box. The maximum number of characters is 3,000.
- Edit a note or delete by clicking Edit.

Adding a note in-line with text
- Highlight the text that you would like to add a note to.
- From the shortcut menu that appears, select Add Note.

- Write your note in the space provided in the Add Note box and click the Add Note button to save. The maximum number of characters is 3,000 (including spaces).
- The text will be highlighted in the same colour as the note.

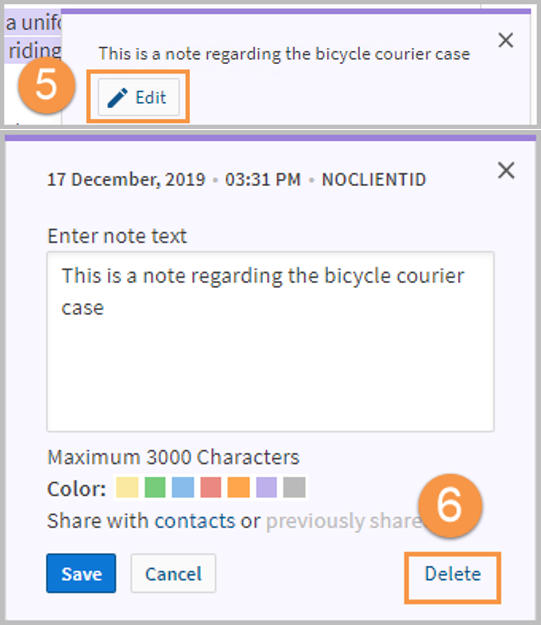
- Edit the note by clicking the note and selecting Edit.
- Delete a note by clicking Delete in the Edit box.
Save a Snippet
A snippet is a section of text which may include a quote, legal principal and/or relevant text. Snippets are saved to a folder and when you click on a saved snippet it will take you directly to that section of the document referenced.
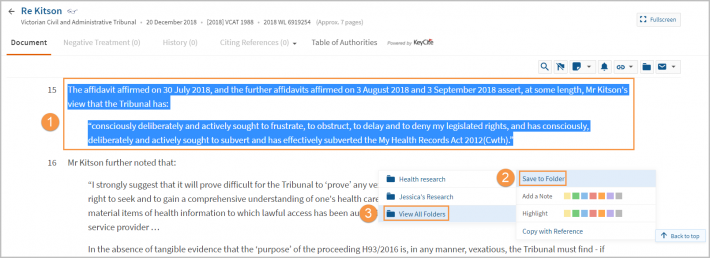
- Select a section of text you want to save.
- To save the snippet to a folder that is already created, select the folder from the menu.
- You will receive an alert on the page to state the snippet has been saved.
- To save the snippet to a new folder, select View all Folders.
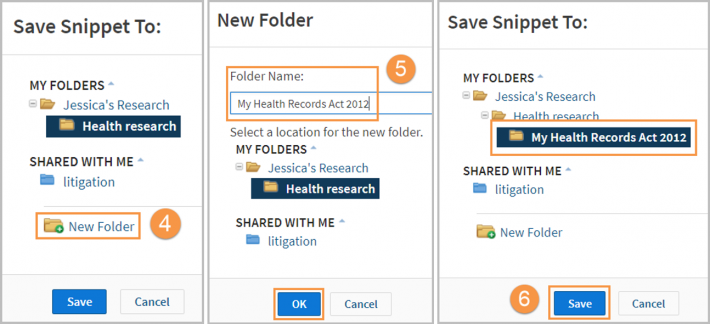
- Select New Folder.
- Name the folder and choose the folder’s location, then click OK.
- Ensure the folder is in the correct location and click Save.
- You will then receive an alert on the page to state the selected text has been saved to the folder.

