Westlaw Australia Guide - Manage alerts
Last Published: January 16, 2020
- Access the Alert Centre from the top menu by clicking Alerts.
- Edit selected allows you to add the selected alert to an alert group.
- Pause a selected alert until a specified date.
- Run the selected alert or resume the scheduled delivery.
- Delete the selected alert.
- Edit alert allows you to edit the full alert – name, content, search terms, delivery, and schedule.
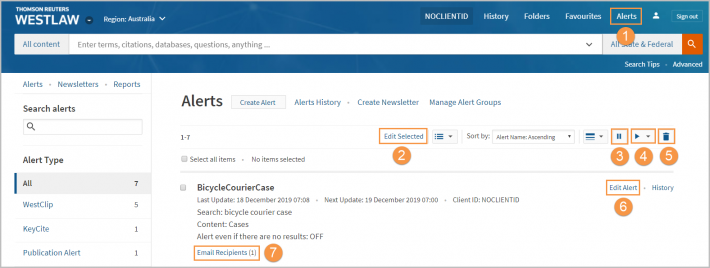
- Email recipients allows you to edit the recipients for the alert.
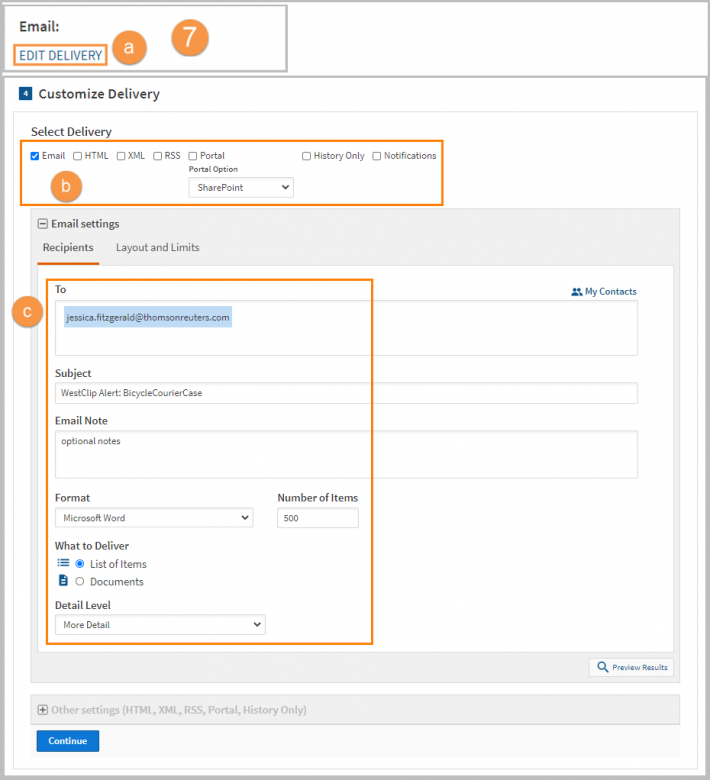
- Edit delivery – Click this link to go directly to the Customise Delivery section of the alert.
- Choose the email format:
- HTML, XML, RSS, Portal - selecting these options allow you to create links to then add to your internal platforms to display the updated alert
- History only - only displays the history of the alert
- Notifications - displays the alert in your Notifications in the top menu
- Add, remove, or edit email addresses, Continue, and Save Alert.
Alert history
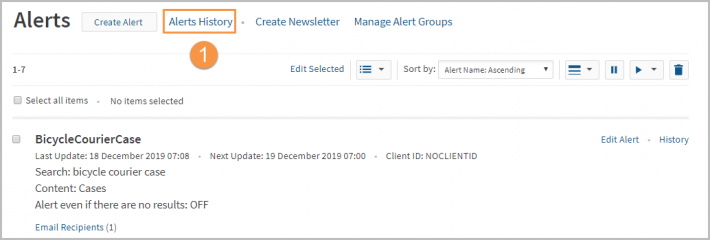
Alerts history shows the alerts you have created that have been updated.
- Select Alerts History in the Alert Centre.
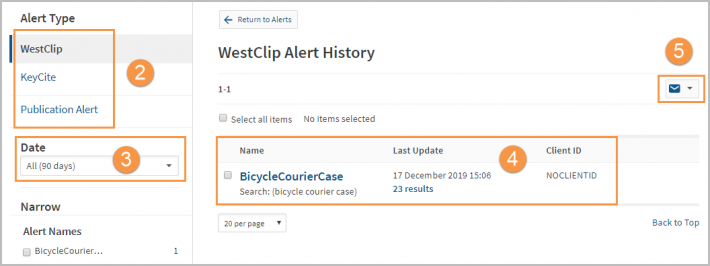
- Filter the alert type by WestClip, KeyCite, or Publication Alert.
- Change the date to see a specific range, or the last 7, 30, or 90 days of alert history.
- The alert history shows the alert name, when it was last updated, and the Client ID.
- Alert history can be emailed, printed, or downloaded.
Alert groups
Alert Groups can filter the alerts shown in the Alert Centre and be used to create content-specific newsletters.
- To create a new Alert Group, either edit an existing alert or create a new alert.
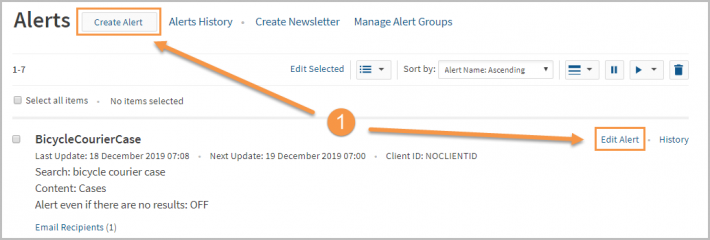
- In the Basics section, click Assign to Alert Group.

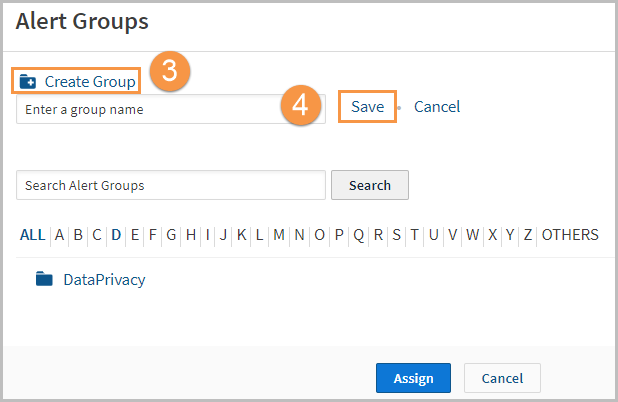
- In the pop-up window, click Create Group.
- Add a group name and click Save.
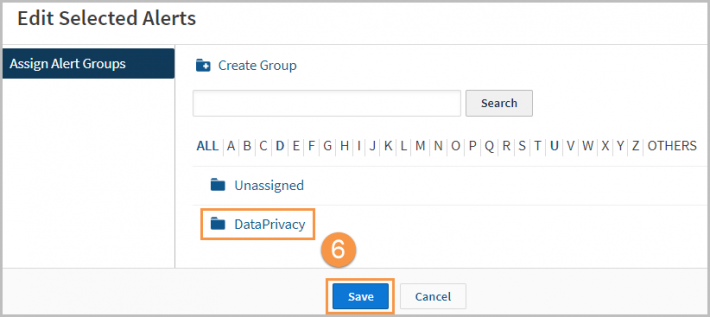
- In the Alert Centre, add alerts to the new Alert Group by ticking the check boxes and selecting Edit Selected.

- Select the alert group and Save.
Newsletters
Newsletters consolidate multiple alerts into one email.
- In the Alert Centre, click Create Newsletter.

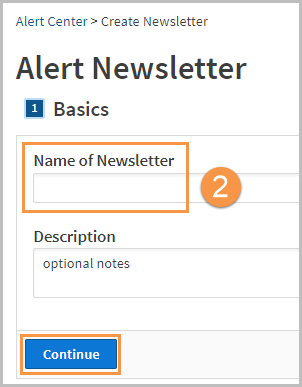
- Add a name for your newsletter and click Continue.
- Add the relevant alerts by selecting Add and Continue.
- If you have created an Alert Group, click this tab to add the group's alerts.
- Your selections will display on the right-hand side.
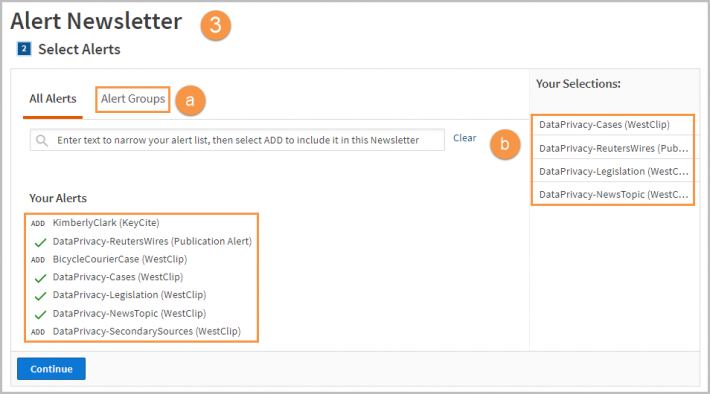
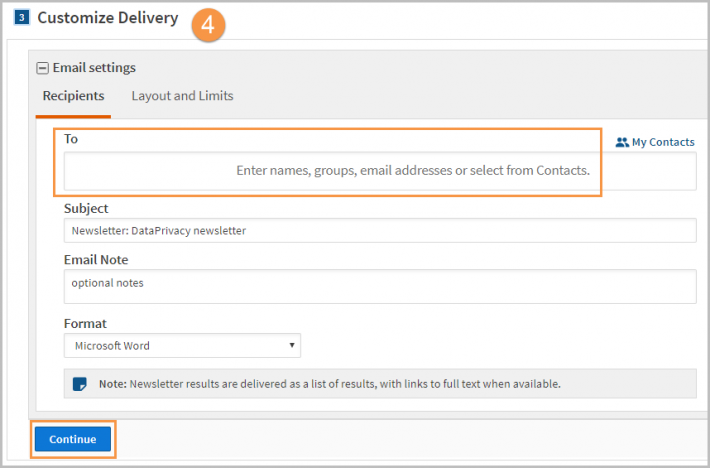
- Add email addresses for the intended recipients and click Continue.
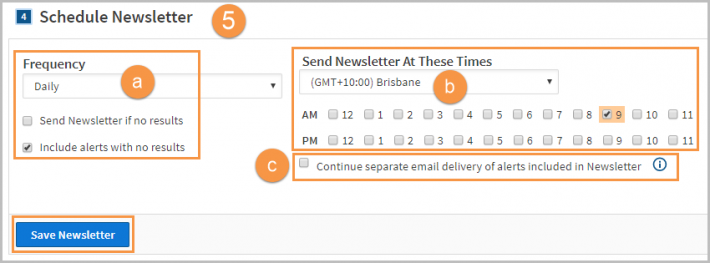
- Schedule the newsletter’s frequency, time, and individual alert delivery.
- Change the frequency to daily, weekdays, weekly, fortnightly or monthly.
Choose whether to send the Newsletter and/or alerts if there are no results. - Select the time zone and time(s) you want the Newsletter to be sent.
- In individual alerts included in the Newsletter are set to deliver via email, the delivery will cease when the alert is added to the Newsletter.
To continue receiving separate email delivery of alerts, tick the checkbox.
- To modify or view your list of newsletters, select Newsletters from the left panel in the Alerts Centre.

